Easy cookie decorating ideas (no piping needed)
16/09/2026
Cookie decorating looks intimidating the moment you search for ideas online. Every "easy" guide seems to hand you a piping bag and a royal icing recipe within the first paragraph, and suddenly the whole project feels like homework rather than fun.
It doesn't have to be that way. This guide sticks to genuinely easy cookie decorating ideas — the kind that need no piping bag, no practice run, and no icing consistency chart. You'll find skill-free shortcuts, a couple of simple techniques worth the extra five minutes, and theme ideas sorted by occasion, from birthdays to Christmas cookie decorating and school events. Whatever cookie recipe you're working from — a classic sugar cookie recipe holds its shape best for decorating — every idea below is paired with exactly what to buy so you can grab your supplies and get started today.
Why "easy" doesn't have to mean piping skills
Search "easy cookie decorating ideas", and most results still walk you through traditional royal icing piping: outlining, flooding, and the wet-on-wet technique for blending colours. It's a genuinely satisfying skill once you've practised it, but calling it "easy" for a first attempt is a stretch.
Royal icing has its place, and plenty of decorated cookies rely on it. It's made with meringue powder rather than egg whites, and once mixed to the right icing consistency, it dries firm within one to two hours — which is exactly why cookie decorators reach for it. But you don't need a piping bag in hand to decorate cookies that look great. This guide leads with the ideas that skip the piping bag altogether, then covers a couple of simple techniques — including a no-piping way to use royal icing.
Skill-free decorating shortcuts (no piping bag required)
These four ideas need nothing more than a steady hand and a packet of decorations - no icing bag, no drying time to plan around, no consistency to get right.
Ready-made edible toppers and wafer decorations
Pre-cut edible wafer toppers and character decorations stick directly to a plain sugar cookie topped with icing or buttercream, with a dab of icing or water. They're printed, pre-shaped, and ready to place: genuinely the fastest way to make a cookie look finished. Browse Shindigs' range of edible cake decorations, including toppers and wafer decorations, that suit any occasion.
Pre-coloured writing icing pens
A writing icing pen is a squeeze tube with a fine nozzle built in — no piping bag, no nozzle-fitting, no mess. Write "Merry Christmas" across a plain iced cookie, add a name for a birthday, or draw a simple face on a festive biscuit. If your handwriting wobbles a little, that's part of the charm. Find writing icing pens in Shindigs' coloured icings and gels range.
Character sprinkles and sugar decorations
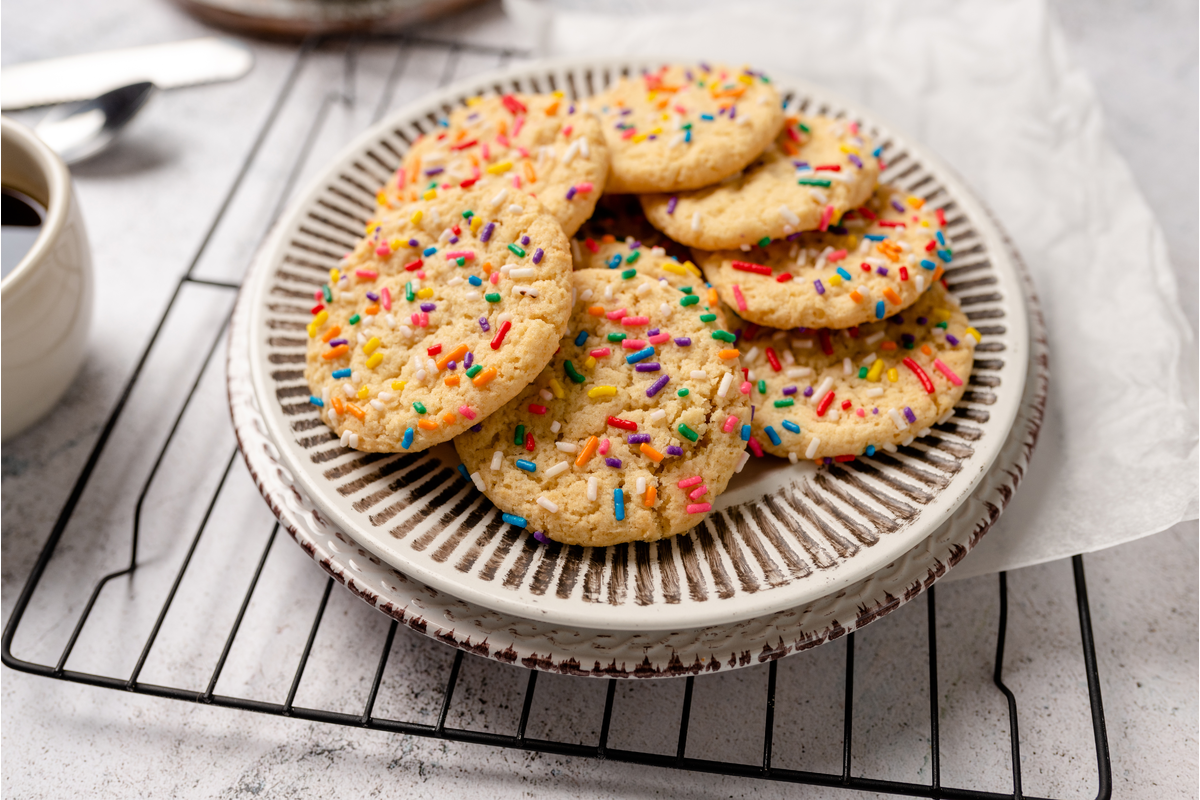
Bake your cookies, spread on a thin layer of icing while it's still workable, and tip character sprinkles, sugar pearls, or edible glitter straight on top. Sprinkles can genuinely lift the appearance of plain sugar cookies by adding colour and texture in seconds, and there's no technique to get wrong. Fill a table with bowls of different shapes and colours, and let kids pick their own; it's one of the most fun, low-mess group decorating setups out there.
Fondant shapes and cut-outs
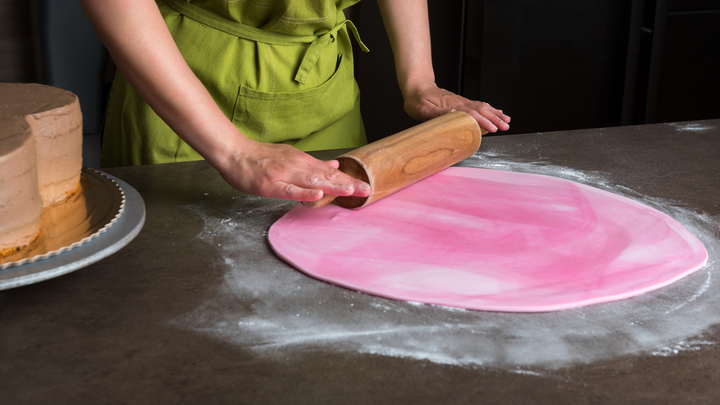
Roll out ready-to-use fondant, cut shapes with small cookie cutters, and press them onto a cookie with a dot of icing as glue. No piping, no drying — just cut, press, done. It's one of the simplest ways to get a clean, uniform look across a whole batch of decorated cookies and works for any theme you can find a cutter for. Want to tint your own fondant rather than buy it pre-coloured? Shindigs' colouring guide covers how to get the shade right with gel food colouring.
Simple techniques that only need a little practice
If you've got a bit more time, these techniques are still genuinely approachable — no advanced piping required, just a bit of patience while things set.
Dip-and-sprinkle
Mix a simple glaze icing to a runny consistency, dip the top of each cookie, let the excess drip off, and add sprinkles or sugar decorations before it sets completely. This method skips a piping bag entirely and gives you a smooth finish every time. Glaze icing generally takes around 24 hours to dry fully, so plan ahead if you're stacking or gifting the treats.
Stamped icing
Spread a thin layer of icing over the cookie, then press a cookie stamp or small cutter into it before it sets, lifting gently to leave a pattern behind. Thicker icing holds the impression more cleanly than thin, so mix to a spreadable rather than runny consistency. It's a low-skill way to add detail without freehand drawing, and it works especially well for festive shapes and holiday designs.
Simple two-colour drizzle
Ice the base of the cookie in one colour, let it firm up, then drizzle a second colour across the top in loose lines using a spoon or a snipped sandwich bag corner — no piping tips needed. A few drops of gel food colouring mixed into your icing give you vibrant colour without thinning the desired consistency too much, and the wet-on-wet effect, where the two colours blend slightly at the edges, looks intentional even when it isn't. Add a toothpick to drag through the drizzle lines for a marbled effect in seconds.
A simple royal icing option (if you want to try it)
If you'd still like to try traditional royal icing without starting piping, there's a version that skips the piping bag entirely. Mix your royal icing to a thicker icing consistency than you'd use for flooding, spread it on with a small spatula or the back of a spoon, and smooth the surface. Because royal icing dries firm within one to two hours, you can add sprinkles or a fondant shape on top while it's still slightly tacky and everything sets completely in place together. Mistakes are easy to fix — a clean, damp cotton swab lifts wet icing cleanly before it sets.
Easy cookie decorating ideas by occasion
Once you've picked a technique, the theme is where the fun really starts. Here are easy cookie decorating ideas grouped by the occasions Australian hosts actually plan for.
Birthday party cookie decorating ideas
Match your decorated cookies to the party's colour scheme using character sprinkles or fondant cut-outs shaped like numbers for the birthday child's age. Writing icing pens make quick work of names on individual sugar cookies: hand them out as edible place cards or party favours instead of a loot bag filler. For a group activity, set out plain iced biscuits and bowls of sprinkles and let kids decorate their own; it's genuinely one of the easiest party activities to set up and pack down. Rounding out the dessert table? Shindigs' cake pop guide is another no-fuss, kid-friendly option in the same spirit.
Christmas cookie decorating ideas
Christmas cookie decorating is where sugar cookies and gingerbread both shine, and the skill-free path works just as well here as anywhere else. Snowflake shapes look sharp when pressed with a small cutter into ready-to-roll fondant. Sprinkles in red, green, and gold do most of the festive work in seconds, and a batch of decorated cookies in a cellophane bag makes an easy homemade gift for teachers or neighbours.
For a Merry Christmas message, a writing icing pen is the simplest approach - ice your Christmas cookie base first, wait for the surface to develop a slight crust, then write across it so the message sits cleanly rather than sinking in. No piping bag involved at any point. Stained-glass-style biscuits made from crushed boiled sweets melted into a cut-out centre are another simple Christmas cookie decorating idea that looks impressive once cooled - and is genuinely fun to make with a group.
Easter ideas
Pastel fondant shapes, eggs, bunnies, and chicks, press on cleanly with a dot of icing, and a light dusting of edible glitter over pastel-iced cookies gives an Easter basket look without any drawing involved. Mix a few drops of gel food colouring into white chocolate for a pastel drizzle that sets completely to a smooth, glossy finish and tastes just as good as it looks.
School, Book Week, and kids' party ideas
For Book Week, character sprinkles or wafer toppers themed to a favourite book turn a plain sugar cookie into something classroom-ready in minutes. For a bake sale or group event, the dip-and-sprinkle method is the most time-efficient when you're making a large quantity — one glaze, one sprinkle-spread, minimal cleanup. Freeze your cut-out dough briefly before baking to help different shapes hold crisp edges in the oven, giving you a neat surface to decorate once cooled.
What you'll need: an Australia-first shopping guide
Most cookie decorating guides point you toward US stockists, which isn't much help when you're shopping in Australia. Here's what to look for and where Shindigs stocks it.
Cookie cutters
Cookie cutters shape your base before any decorating starts. Browse the cookie cutter range for classic shapes and seasonal themes - the right cutter does much of the "theme" work before you've added a single sprinkle.
Icing and gels
Ready-coloured writing icing pens, fondant, and royal icing all live in one place. The coloured icings and gels range covers all three, so you're not hunting across multiple stores for one project.
Edible decorations
Sprinkles, sugar pearls, edible glitter, and paint brushes for detail work all sit in the edible cake decorations range — the fastest section to shop if you're leaning entirely on the skill-free shortcuts above.
Cookie decorating tools
Stamps, small spatulas, and piping tips sit in the cake decorating tools range, handy if you want to try stamped icing, pipe dots for simple detail, or the basic royal icing option.
A few more ideas to try
A few extra tricks sit just above the shortcuts but are still well short of full piping technique. Pipe dots - small, even dots of icing from a snipped sandwich bag corner - are a genuinely easy step up from a writing pen and look intentional even when the spacing isn't perfectly even. A clean paintbrush dipped in edible paint adds fine detail without any piping, and melted white chocolate is a good alternative to icing if you want a glossy, smooth finish that sets completely firm once cooled. Working in several colours? Decorate in stages, letting one colour set before adding the next — it keeps the colours clean and gives you more control without needing a video tutorial to get the timing right. And if you're planning a full dessert table, Shindigs' cupcake decorating guide covers how to match sweet treats in the same no-fuss spirit.
Related articles


© 2003 - 2026 Shindigs. ABN: 51101315502.